
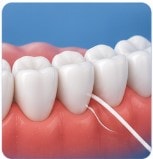
Use about 18 inches of floss, wrap most around your middle fingers, and guide a fresh section between each tooth. Curve the floss into a C-shape around each tooth and slide it gently below the gumline — don't snap or saw. Floss once daily, ideally before bed.
What You'll Learn
How to Floss Correctly: Step by Step
Cut the right amount
Break off about 18 inches of floss. This gives you enough to use a fresh section for each tooth.
Wind it around your fingers
Wrap most of the floss around the middle finger of one hand, and the rest around the middle finger of the other. Leave about 1–2 inches of floss to work with.
Hold it taut
Hold the floss tightly between your thumbs and index fingers. Keep it taut — a slack piece of floss won't clean effectively.
Slide gently between teeth
Guide the floss between your teeth using a gentle zigzag motion. Never snap or force the floss — this can cut your gums.
Curve into a C-shape
When the floss reaches the gumline, curve it into a C-shape against one tooth. Gently slide it into the space between the gum and the tooth.
Scrape up and down
Hold the floss firmly against the tooth and move it up and down to scrape the side of the tooth. Repeat on the adjacent tooth in the same space.
Use a fresh section for each tooth
As you move from tooth to tooth, unwind a fresh section of floss. Using the same section spreads bacteria from tooth to tooth.
Don't forget the back of your last molars
The back surface of your last molars is often missed. Curve the floss around the back of each molar and clean that surface too.
Most Common Flossing Mistakes
Snapping the floss into the gums
Guide it gently with a zigzag motion — snapping cuts gum tissue and causes bleeding
Only going straight up and down
Curve into a C-shape to clean below the gumline where plaque hides
Using the same section for every tooth
Use a fresh section for each tooth to avoid spreading bacteria
Skipping the back molars
The back surfaces of your last molars need flossing too — they're a common spot for cavities
Flossing too aggressively
Gentle pressure is all you need — aggressive flossing damages gum tissue over time
Flossing Tools: Which One Is Right for You?
Traditional string floss
Best for: Most peopleThe gold standard. Waxed floss slides easily between tight contacts; unwaxed floss may squeak to signal a clean tooth.
Floss picks
Best for: Convenience seekers, back teethEasy to use and great for on-the-go. Less effective than string floss because you use the same piece throughout. Still much better than not flossing.
Water flosser (Waterpik)
Best for: Braces, bridges, implants, limited dexterityExcellent at flushing debris and reducing gum inflammation. Best used as a complement to string floss, not a replacement.
Floss threaders
Best for: Braces, bridges, permanent retainersA thin loop that threads floss under wires and through bridge pontics. Essential for anyone with fixed dental work.
Interdental brushes
Best for: Wide gaps between teeth, implantsSmall brushes that fit between teeth. Particularly effective for cleaning around implants and larger spaces.
Frequently Asked Questions
Related Learning Center Articles
Should I Brush Before or After Breakfast?
Timing your brushing right protects enamel from breakfast acids.
Is an Electric Toothbrush Better Than a Manual?
Compare electric and manual toothbrushes to find the right fit for your routine.
How Often Should I Replace My Toothbrush?
Learn the signs that it's time for a new brush and why it matters.

How Do I Reduce Tooth Sensitivity?
Identify the cause of sensitivity and find lasting relief.
Let us show you the right technique
Our hygienists are happy to walk you through proper flossing at your next cleaning. Schedule your visit today.
Schedule an Appointment(770) 691-5051